

TV bonding machine --Operating Instructions
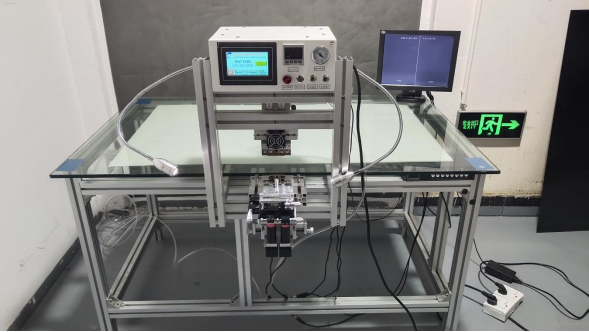
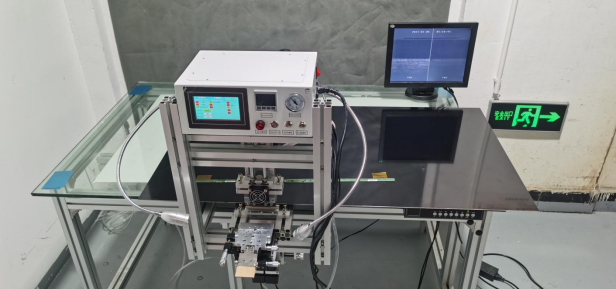
The complete installation diagram is as follows
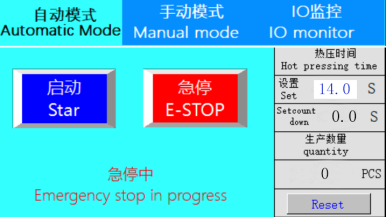
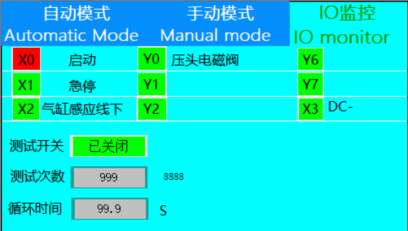
1. 开机画面,点系统进入按键
On the boot screen, click the system enter button

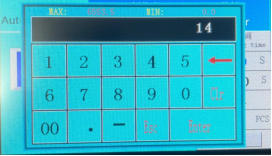
2. 默认出厂设置是 14S的预压时间,如果需要修改,点时间数字就会出现修改界面。
The default factory setting is the preload time of 14S. If you need to modify it, click the time number and the modification interface will appear.
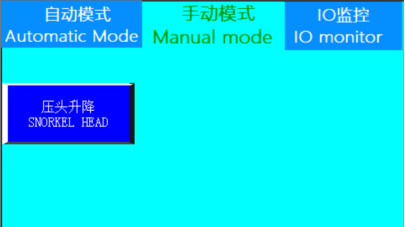
3. 通过手动操作,控制压头的升降.
By manual operation, the lifting and lowering of the pressure head is controlled.
4. IO监控不需要调整,保持出厂设置即可。
IO monitor does not need to be adjusted, just keep the factory settings.
以上就是系统的全部介绍
The above is the whole introduction of the system
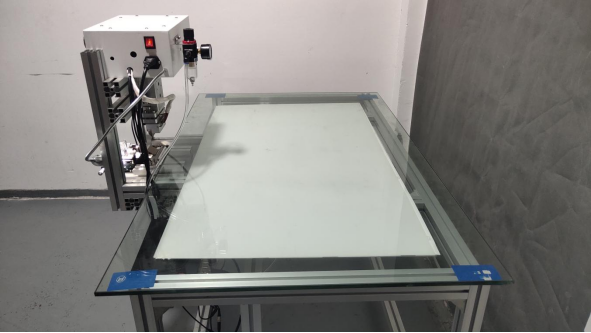
第1步:安装背光和玻璃(如下图所示)
Step 1: Install Backlight and Glass (as shown below)
1. 白色部分为背光摆放区,放好后安装玻璃平台(建议使用12MM厚度的玻璃)
The white part is the backlight placement area. After placing it,install the glass platform
(it is recommended to use glass with a thickness of 12MM)
第2步:平台高低平衡调节
Step 2: Platform Height Balance Adjustment
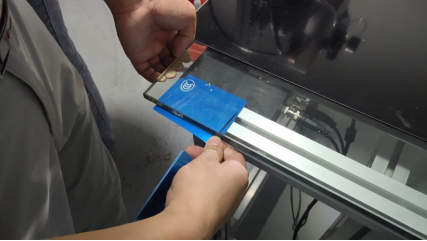
1. 把TV液晶放置在平台上(如下图所示)
1. Place the TV LCD on the platform (as shown below)
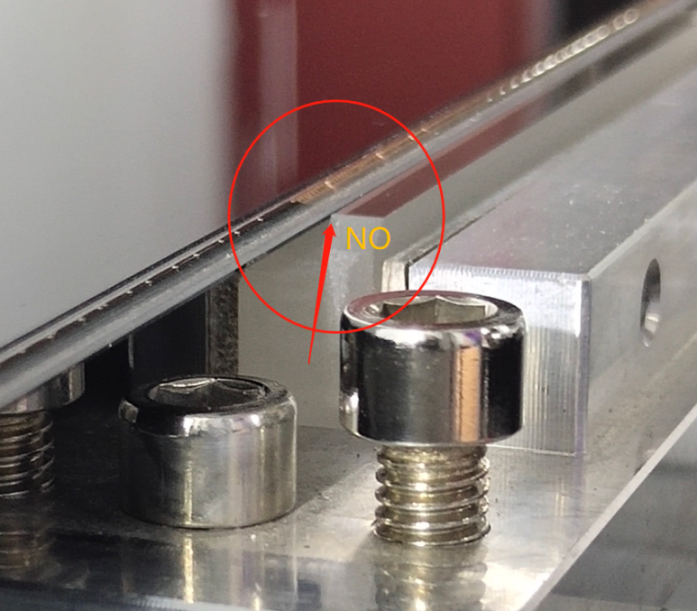
2. 把TV液晶边缘移至靠近石英条(如下图所示,发现TV液晶边缘高度低于石英条)
2. Move the edge of the TV liquid crystal closer to the quartz strip (as shown in the figure below, it is found that the height of the edge of the TV liquid crystal is lower than that of the quartz strip)
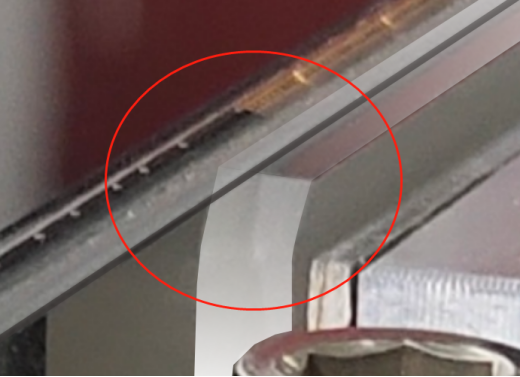
3. 用蓝色垫片垫玻璃下面的四个角,调节平台的高低平衡度(如下图所示)
Use the blue spacers to pad the four corners under the glass to adjust the height balance of the platform (as shown in the picture below)

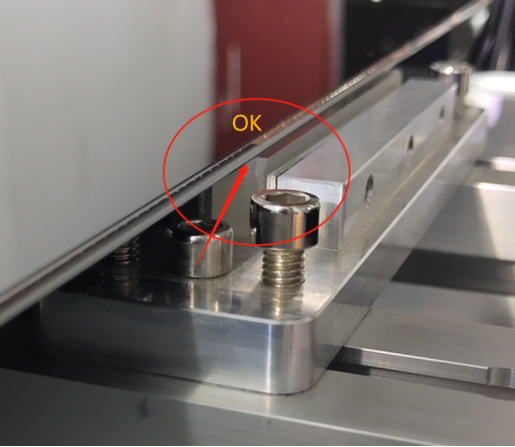
2. TV液晶在石英条表面贴紧即可,注意TV液晶与石英条表面不能有间隙。(如下图所示)
The TV liquid crystal can be tightly attached to the surface of the quartz strip. Note that there must be no gap between the TV LCD and the surface of the quartz strip. (As follows)
第3步摄像头调节
Step 3: Cameras Adjustment
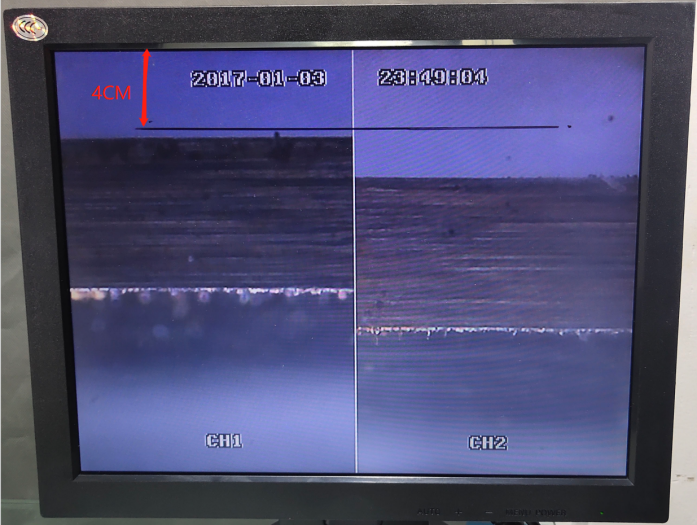
1. 屏幕画定位线,把刀头降下来(如图所示:距离边缘4CM 正常出厂前已画好定位线)
1. Draw a positioning line on the screen and lower the cutter head (as shown in the figure: 4CM from the edge, the positioning line has been drawn before leaving the factory)
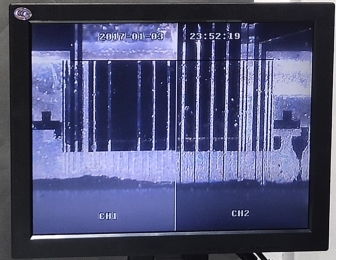
2. 调节摄头像位置与定位线水平对齐(如下图所示)
2. Adjust the position of the camera head to align with the positioning line horizontally (as shown in the figure below)
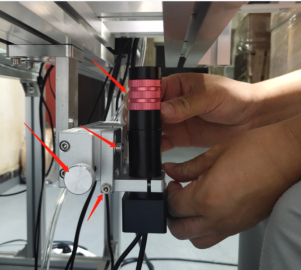
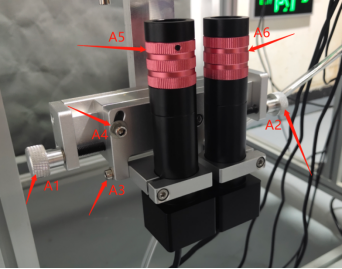
1.A1/A2摄像头左右调节
1.A1/A2 camera left and right adjustment
2.A3摄像头前后调节(用手轻移位置即可)注:螺丝不用锁太紧,稍微固定即可
2.The A3 camera front and rear Adjustment (just move the position by hand)
Pls be note: The screws do not need to be locked too tightly, just fix them slightly
3.A4摄像头角度调节(用手轻移位置即可)注:螺丝不用锁太紧,稍微固定即可
3. A4 camera angle adjustment (slightly move the position by hand)
Pls be note: The screw does not need to be locked too tightly, just fix it slightly
4. A5/A6摄像头清晰度调节
4. A5/A6 camera definition adjustment
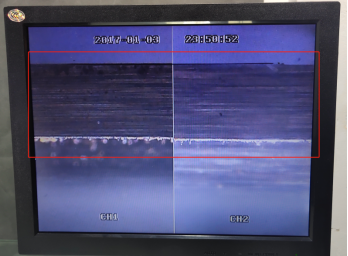
5. 用以上步骤调整到以下如图所示即可
5.Use the above steps to adjust to the following figure.
第4步刀头平衡度调节
Step 4 :Adjust the balance of the cutter head
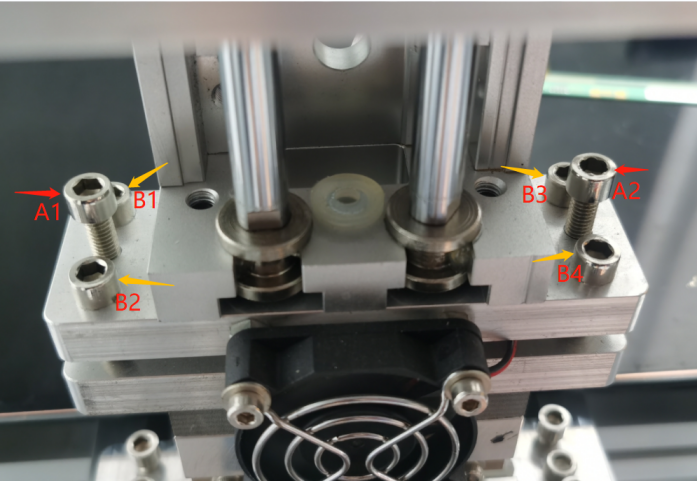
压头平衡调节定义
A1:左锁紧固定,螺丝松(逆时针)刀口左边解锁,螺丝紧(顺时针),刀口左边固定紧
A2:右锁紧固定,螺丝松(逆时针)刀口右边解锁,螺丝紧(顺时针),刀口右边固定紧
B1:左前平衡调节,螺丝松(逆时针),刀口往下,螺丝紧(顺时针),刀口往上
B2:左后平衡调节,螺丝松(逆时针),刀口往下,螺丝紧(顺时针),刀口往上
B3:右前平衡调节,螺丝松(逆时针),刀口往下,螺丝紧(顺时针),刀口往上
B4:右后平衡调节,螺丝松(逆时针),刀口往下,螺丝紧(顺时针),刀口往上
Head Balance Adjustment Definition
A1:The left is locked and fixed, the screw is loose (counterclockwise), the left side of the blade is unlocked, the screw is tight (clockwise), the left side of the blade is fixed tightly
A2:The right is locked and fixed, the screw is loose (counterclockwise), the right side of the blade is unlocked, the screw is tight (clockwise), the right side of the blade is fixed tightly
B1:Left front balance adjustment, the screw is loose (counterclockwise), the blade is down, the screw is tight (clockwise), the blade is up
B2:Left rear balance adjustment, the screw is loose (counterclockwise), the blade is down, the screw is tight (clockwise), the blade is up
B3:Right front balance adjustment, the screw is loose (counterclockwise), the blade is down, the screw is tight (clockwise), the blade is up
B4:Right rear balance adjustment, the screw is loose (counterclockwise), the blade is down, the screw is tight (clockwise), the blade is up
如下图所示:
As shown below:
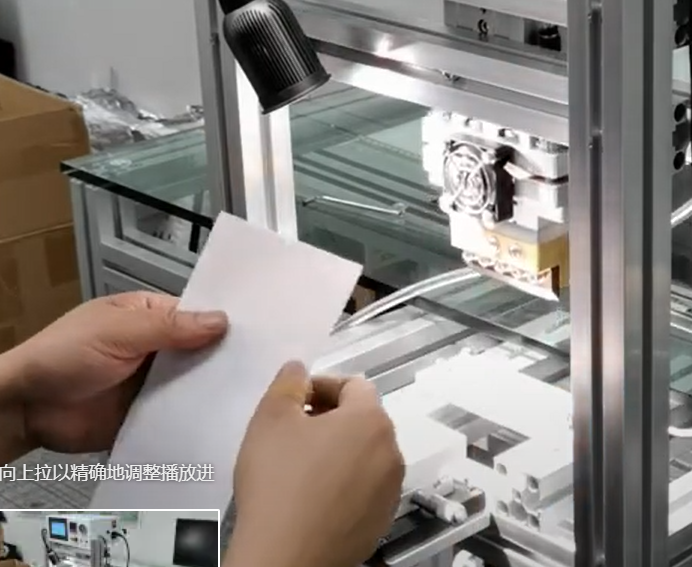
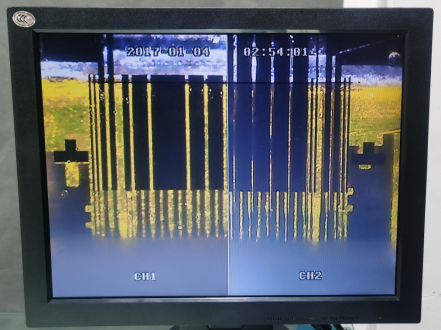
第1步热敏纸试压一下,找出不平衡的一头(如图2所示)
Step 1 Test the pressure of the thermal paper to find the unbalanced end (as shown in Figure 2)
图1为压头正常平衡示意图
Figure 1 is a schematic diagram of the normal balance of the pressure head
图2为压头不平衡示意图(右不平)
Figure 2 is a schematic diagram of the unbalanced pressure head (unbalanced on the right)

调节方法Adjustment method:
需要拧松B3,B4螺丝,锁紧A2螺丝,A2螺丝锁紧后再次压,检查平衡,如还是不平重复以上动作,直到平衡为止(单次旋转角度约30度一次)
Need to loosen B3, B4 screws,Tighten the A2 screw,After the A2 screw is tightened, press again,
Check balance.
If it is still uneven, repeat the above actions until it is balanced (single rotation angle is about 30 degrees once)
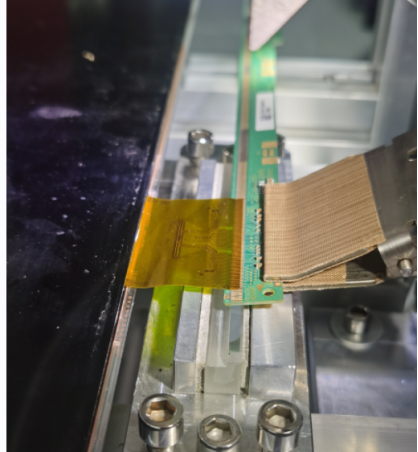
第5步放置对位ACF排线与TV液晶对齐
Step 5: Place the alignment ACF cable to align with the TV LCD
1. 先把ACF排线固定在夹子上(如下图所示)
First fix the ACF Flex on the clip (as shown in the picture below)

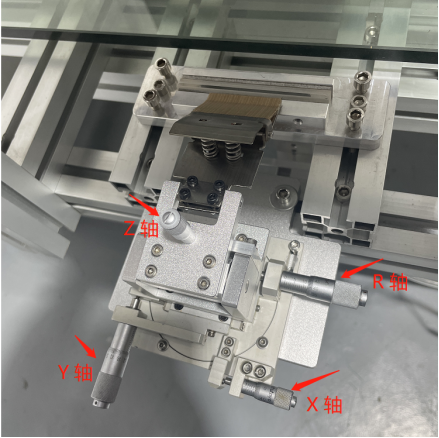
4. 应用微调尺调整位置(如下图所示)
Apply the spinner to adjust the position (as shown in the picture below)
Y:前后调节front and rear adjustment
Z:高低调节Height adjustment
X:左右调节Left and right adjustment
R: 角度调节Angle adjustment
Y:front and rear adjustment
Z:Height adjustment
X:Left and right adjustment
R: Angle adjustment
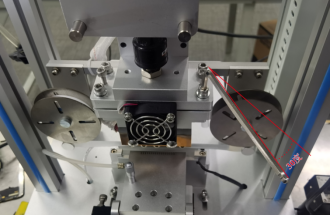
调节完成后(如图所示)
After the adjustment is completed (as shown in the picture)
第6步电路板链接ACF排线
Step 6:The circuit board is connected to the ACF flex
1. 按图1所示定位点对好位置,再按图2所示用电烙铁压一下固定好。
Align the positioning points as shown in Figure 1, and then press and fix it with an electric soldering iron as shown in Figure
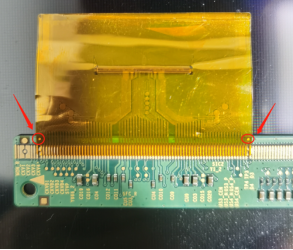
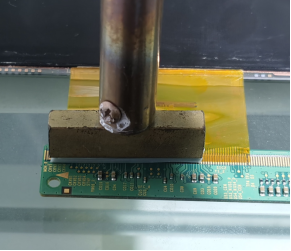
(Picture 1) (Picture 2)
2. 再重复第5步操作,把所有需要连接的ACF排线完成即可,用机器压好。
2. Repeat step 5 to complete all the ACF cables that need to be connected, and press them with the machine.
3. 整个操作完成
3. The whole operation is completed